Let's start at the beginning with a simple HTML document. We'll add the mechanisms necessary to read and process an XML document and finally add some scripts to get the XML data onto the HTML page.
Code Listing 5-5 (included on the companion CD in the Chap05\Lst5_5.htm file) shows a basic HTML page. We will build into this page everything we need to access and display an XML document.
Code Listing 5-5.
|
As mentioned earlier, the XML processor acts as the middle layer between the XML document and the HTML page (or any other application, for that matter). We need to create an instance of the XML processor as an object on our Web page so that we can interact with the page through scripting. How you instantiate the parser object depends on which processor you use.
NOTE
Creating an instance of, or instantiating, a processor means that you start the processor application (Msxml, for example) and that it is available in memory for you to work with.
Assuming that you are using a Microsoft processor, you can use either the Microsoft ActiveX control in C++ or the Java-based applet. If you decide to use the Java applet, you need to include an Applet element in the body of your document. This element should look similar to the code below:
<BODY>
  <APPLET CODE=com.ms.xml.dso.XMLDSO.class
    WIDTH=100% HEIGHT=0 ID=xmldso MAYSCRIPT=true>
  <!-- In next line, replace filename with XML document name. -->
  <PARAM NAME="URL" VALUE="filename">
  </APPLET>
</BODY>
|
Unless you are using Microsoft Internet Explorer 5, XML data is not automatically loaded when the page is loaded. You must include a script to load XML data when the page loads. We'll add a simple script for the document.onload event that starts a function called loadDoc. This function includes all the code that parses the XML data.
<SCRIPT LANGUAGE="JavaScript" FOR=window EVENT=onload> loadDoc(); </SCRIPT> |
Here's the script that creates an instance of the processor and reads the XML document:
<SCRIPT LANGUAGE="JavaScript">
  var xmlDoc = new ActiveXObject("microsoft.xmldom");
  xmlDoc.load("Lst5_3.xml");

  function loadDoc()
    {
    if (xmlDoc.readyState == "4")
      start()
    else
      window.setTimeout("loadDoc()", 4000);
    }

  function start()
    {
    var rootElem = xmlDoc.documentElement;
    var toVar = rootElem.childNodes.item(0).text;
    }
</SCRIPT>
|
Now the coding starts to get interesting. Let's go through this script a piece at a time. The first section of the script instantiates the XML processor and tells it what document to use:
var xmlDoc = new ActiveXObject("microsoft.xmldom");
xmlDoc.load("Lst5_3.xml");
|
This code uses the ActiveX object microsoft.xmldom and assigns the instance to the variable xmlDoc. Then the name of the XML file (Lst5_3.xml) is passed to the load method of the ActiveX control instance.
The next part of the script defines the loadDoc function, which checks the readyState property of the XML processor. When the processor reaches a readyState of 4 (meaning that the document is fully loaded), the start function is called.
NOTE
The readyState property can have several possible values. For more information, see the readyState document property in Appendix A.
The last part of the script defines the start function. This function "walks" the XML document tree and pulls out the data. This is really where we get into the XML object model.
Let's look at the code again:
function start()
  {
  var rootElem = xmlDoc.documentElement;
  var toVar = rootElem.childNodes.item(0).text;
  }
|
The first line of the function sets the variable rootElem to the root node of the XML document. The root node is the single document element discussed earlier and in previous chapters. Here are corresponding lines in the document, the tree, and the code:
<?xml version="1.0"?> <EMAIL> |
is at the same level as
DOCUMENT |---XMLDECL | |---ATTRIBUTE version "1.0" +---ELEMENT EMAIL |
which is referenced by the script in the line
var rootElem = xmlDoc.documentElement; |
The second line of the function gets the text content of the first child of the root element (the first child is the To element) by using the childNodes.item(0) property, and assigns the value to the variable toVar. In this line, the code has walked to another level of the document tree.
Here is where this level maps in the document, tree, and code:
<?xml version="1.0"?> <EMAIL> <TO>Jodie@msn.com</TO> |
is at the same level in the tree as
DOCUMENT
|---XMLDECL
|   |---ATTRIBUTE version "1.0"
+---ELEMENT EMAIL
    |---ELEMENT TO
    |   +---PCDATA "Jodie@msn.com"
|
which corresponds to the code
var toVar = rootElem.childNodes.item(0).text; |
Code Listing 5-6 puts all the code into our HTML document. The entire page, in a file named Chap05\Lst5_6.htm, is accessible on the companion CD.
Code Listing 5-6.
|
If you understand this code, you'll understand how to instantiate an XML processor application, load an XML document, walk the document tree, and get data from the tree. Believe it or not, the difficult part is over! These are the basics upon which all other XML document processing is built.
Now we'll open the page to see how it looks. The results are shown in Figure 5-1.
NOTE
If you are creating your own HTML page to match this sample, you will need to copy the XML document named Chap05\Lst5_3.xml from the companion CD for the page to work. The XML document should be placed in the same folder that contains your HTML page.
Figure 5-1. A sample HTML page that has processed an XML document.
If your page looks just like the one shown in Figure 5-1, the page is working perfectly! This page is really not much to look at because we haven't done anything with the data we're getting from the XML document. Examine the code closely and you'll see that nothing on the page tells the data how it should look or whether it should even appear on the page.
Making the data appear on the page takes a bit more work, so before doing that, let's make sure the code is working properly. To quickly determine whether we are getting the data we expect from the XML document, we can display an alert box that contains the value returned from an XML variable. First we'll change the start method so that it contains the following code:
function start()
  {
  var rootElem = xmlDoc.documentElement;
  var toVar = rootElem.childNodes.item(0).text;
  alert(toVar);
  }
|
You should see an alert box like the one shown here:
The alert box shows that the variable contains the correct value. Now we need to get the data on the page. Doing so requires an additional HTML element that contains the content and additional script code to place the content on the HTML page. First let's add the HTML element for the content. In the body of the HTML document, we'll add the following element:
<DIV ID="to" STYLE="font-weight:bold;font-size:16"> To: <SPAN ID="todata" STYLE="font-weight:normal"></SPAN> </DIV> |
This Div element provides formatting and layout for the data. The element contains a Span element that will actually contain the data obtained from the XML document. You will notice that the Div element also contains some formatting information that makes the data look presentable. Notice as well that the Span element has an ID of todata so that we can refer to it in our script code.
We now need to add the script code that will insert the XML data into the Span element. To do that, we'll go back to the start function and replace the call to the alert method with the following:
todata.innerText = toVar; |
This tells the document to replace the text in the object todata (which happens to be empty) with the value of the variable toVar. You'll recall that we set the value of toVar in the line above this one so that it contains data from our XML document. The code, which you can find in the Chap05\Lst5_7.htm file on the companion CD, should now look like that shown in Code Listing 5-7.
Code Listing 5-7.
|
Now when the page is opened, the data is displayed as HTML data, as shown in Figure 5-2.
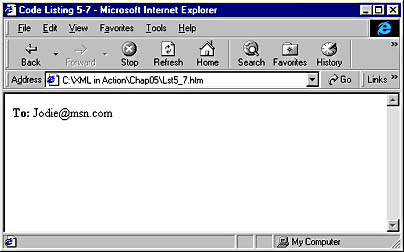
Figure 5-2. XML data displayed as HTML data.
This document is almost done; but before we complete it, we should make one small optimization that will reduce the complexity of the code and reduce the size of the script. In the current script, we are assigning the XML value to a variable and then replacing the text in the Span element with the value of the variable. Instead, we can take a shortcut and put the XML data into the Span element in one step. So the code
var toVar = rootElem.childNodes.item(0).text; todata.innerText = toVar; |
becomes
todata.innerText = rootElem.childNodes.item(0).text; |
This is a small change, but optimizations like this one can really make a difference in a large document.
Now let's add the HTML code and scripting needed to display the rest of the elements in the XML document. To do that, we can simply reproduce the steps discussed above for every element that we want to display.
NOTE
Before looking at the code below or on the companion CD, see if you can do this on your own. Remember, you need an HTML element that will contain the data and some script code to retrieve the data and make it appear on the HTML page.
Code Listing 5-8 (on the companion CD in Chap05\Lst5_8.htm) contains the finished page with all the necessary HTML and script code.
Code Listing 5-8.
|
The finished document is displayed as shown in Figure 5-3.
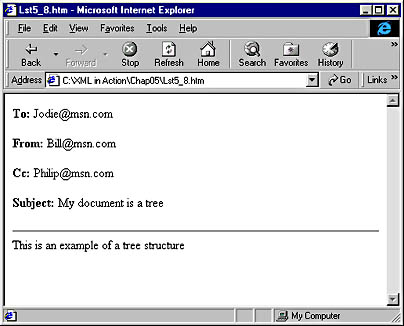
Figure 5-3. A complete XML document displayed as an HTML page.
Before we go any further, let's address the potential hesitation some of you might experience about XML after seeing the amount of work involved in getting XML data on an HTML page. You might think that it would have been much easier to create the document by hand in HTML. You wouldn't have needed all that script code or the separate XML document, and creating a single HTML document would have been much simpler.
While it is obvious that a lot of work is involved for you to create the simple document used in the example, some enormous benefits can be realized by using XML, including the following:
These are just a few of the ways XML can make data more powerful and flexible. While it's true that additional time is needed up front to get XML working, the benefits can far outweigh the costs in most applications. It should also be noted that the purpose of many of the examples in this chapter is to demonstrate how XML documents are structured and how the processor works to extract data from a document. As you will see in later chapters, there are other ways to get XML data into a Web page or application, such as the XML Data Source Object (covered in Chapter 6), XSL (Extensible Stylesheet Language, (Chapter 8) and XSL Patterns (Chapter 9) In addition, Microsoft Internet Explorer 5 adds support for XML Data Islands (Chapter 11), which allows you to include XML code directly in an HTML page without needing a separate XML document. These methods can add more benefits to the use of XML for structuring and storing data.